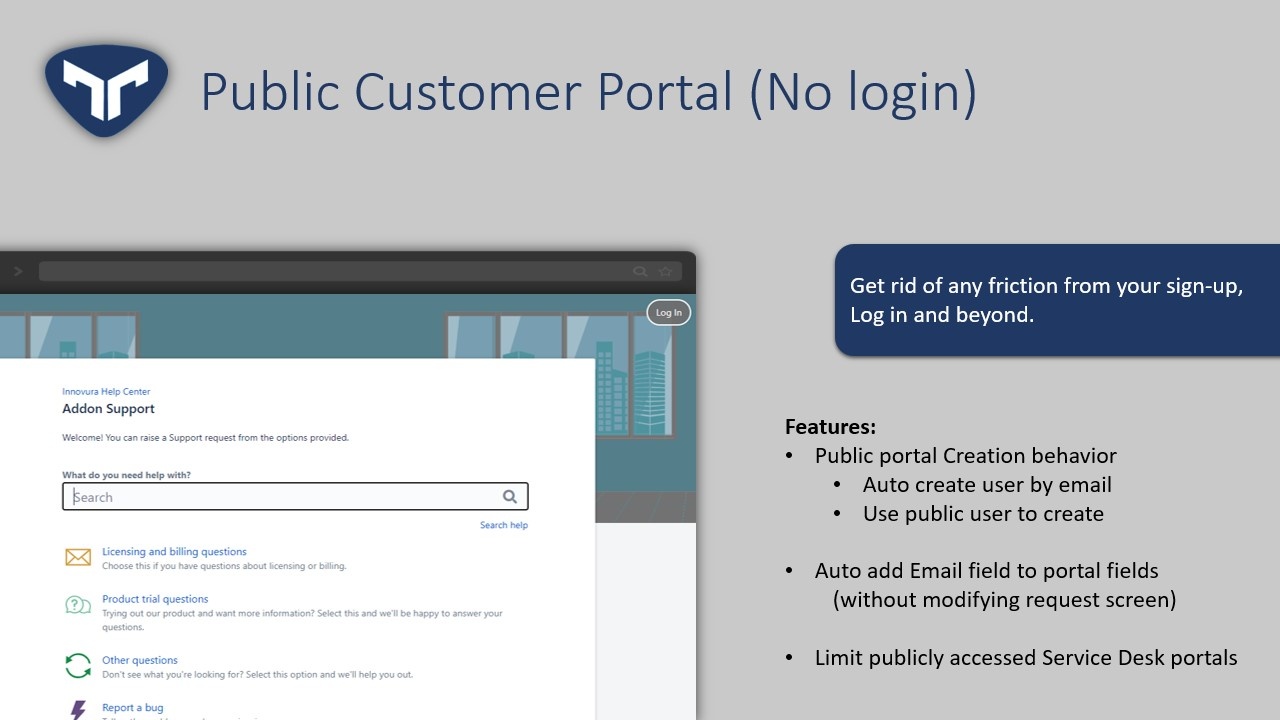
To configure Public Customer Portal you need the following:
Public User (Customer User with no Jira privilege)
Email Custom field
After having all the above requirements, please follow these steps:
Instructions
Select the Jira icon > Jira settings > Apps or Add ons.
Under Tinker for JSD, click Public Customer Portal

1. Select public user
Public user will be used to allow users who are accessing Jira anonymously

After choosing the user, click save
Please do not choose user with Jira Service Desk Agent role which will open agent functionality publicly
2. Select Email field
This field will be visible only to non-logged in user to enter their email address when creating a request
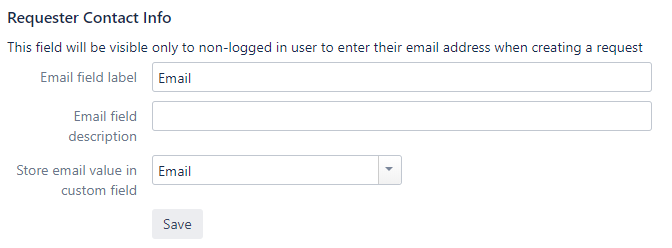
Fill in the email field label and choose a custom field (compatible customfields are text field & Email Customfield, then click save
No need to add the email custom field to request screen since it will be duplicated
3. Select Allowed Portals
By default all portals are not publicly accessible, when selecting a public portal , it will be visible to public users
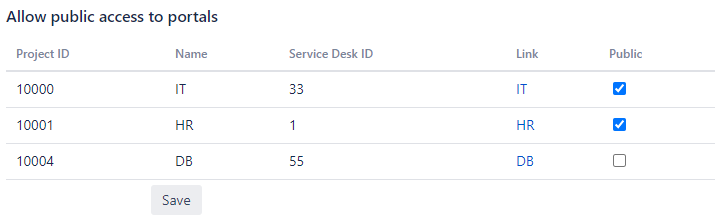
After updating click save.
4. Add Recaptcha V3
Recaptcha is very imporant when you open your customer portal publicly to avoid spam
To start using reCAPTCHA, you need to sign up for an API key pair for your site. The key pair consists of a site key and secret key.
After obtaining the Secret and site key, add them to your configurations
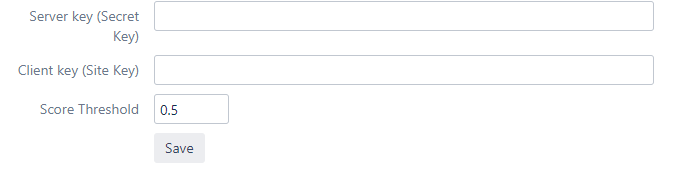
reCAPTCHA v3 returns a score (1.0 is very likely a good interaction, 0.0 is very likely a bot). Based on the score, you can take variable action in the context of your site. By default, you can use a threshold of 0.5.
Dont forget to Save
5. Request Creation Behavior
By default Tinker for JSD creates requests using the public user, and if you’d like to automate the creation of users once a new email field is added choose Create new user for entered email.
It will create a user with the following details:
Username: EMAIL_VALUE
Email: EMAIL_VALUE
Display Name: EMAIL_VALUE
Password: Empty

You may also add the newly added users to certain groups based on your implementation.